Image Map

Sunday, February 8, 2015

Love is in the Air

Valentine's Day is right around the corner and love is in the air. So naturally my door needed a little Valentine's Day love too. This wreath is super cute and is a great to use for Valentine's Day as well for spring.

I warn you creating the pieces is a tad time consuming but once they are completed its simple to put it together. 

Here is what you will need to create this one of a kind rosette wreath:
Patterned Card Stock (for one rosette you will need 3 sheets) x 10
Solid Card Stock (again 3 sheets for one rosette) x 2
Cricut Explore
Hot Glue Gun
Flat Round Wreath Form
Ribbon


 ~ Step 1 ~

First you need to select the paper you will want to work with. I chose many different patterns to make my wreath vibrant and colorful, but I still kept in the same theme. 


Using my Cricut Explore I cut out my rosette pieces (excuse my crafting snack! If you have never tried them barkTHINS are THE best!)


~ Step 2 ~

Each rosette piece has score lines, alternate the folds so that it looks like a fan. After all of the pieces are folded (each rosette should have 5 pieces to it) using the little tab that is on the right end of each, add a little hot glue and attach to the next piece.


~ Step 3 ~

Connect the ends of the strip of fans you put together using the last tab left and a little hot glue. On the back of the connected rosette hot glue one of the circles that you cut out along with the rosette. Do the same to the front with a different pattern or colored paper.


~ Step 4 ~

Once all of the rosettes have been put together it's time to attach them to the foam wreath form. I arranged them randomly on the wreath form until I was happy with the final product. Snap a pic of the arrangement take them off and then start to hot glue them back on.


~ Step 5 ~

Last but not least it's time to add some ribbon. I added this cute chevron ribbon I found at Michaels in the valentines day section. I thought the colors would work to carry the wreath over into spring.


To add a little flare I tied a double loop bow. This wreath makes me super happy and extremely ready for warm spring weather (as another 10 -18 inches of snow is expected to fall tonight into tomorrow, gotta love New England winters).

I hope you enjoyed this Valentine's Day inspired post! 

Happy Crafting! ~ T

I would love to see your versions of this wreath! Send them to my email located on my Contact Me Page and I will feature it on my next blog post!


Monday, January 26, 2015

Batter Up!

There is nothing better than thinking of spring time, and the warmer weather that lies ahead. When I was contacted to do wedding invitations with a baseball theme I jumped at the chance. What is more spring time then America's favorite past time. 

The task at hand was to create RedSox themed invites for the Bride and Groom who are die hard fans. It was an intriguing task and I immediately had tons of ideas floating in my head. 

My idea was a pocket invite with an insert that looks like a ticket and a matching RSVP card with the same ticket look. I wanted the insert to have a vintage baseball feel with the RedSox colors.Here is what I designed using my Cricut Design Space software.


I picked out a navy blue linen pocket invite, metallic champagne cardstock for the insert/RSVP, and Jupiter red metallic paper for the accents all which I got from Paper and More.

Once all of the pieces were cut out It was time to put everything together. 

To apply the the insert I used my Scotch Advanced Tape Glider. It is a must have tool for any paper crafter.

Once the insert has been adhered to the inside of the pocket invite it's time to add the accents.Small pieces like the lettering, the and sign, and the pennant are hard to put adhesive on and the Xyron Sticker Maker is the perfect solution to that. 


For the outside of the invite to tie everything together (literally) I chose a red and white bankers twine to tie around the pocket invite one it was closed. To add a little something I cut out a cute baseball bat with the names of the bride and Groom printed on it. 

Here is the final product all wrapped up!!
Speckled craft paper envelopes for the RSVP card and the invite round it out to give it a vintage baseball feel. 

I hope you enjoyed this blog post as much as I enjoyed creating such a unique wedding invitation!

Happy Crafting!! ~ T

What kind of themed invites would you like to see on the blog? 
If interested in Taylor Ink services please contact me by email or follow me on any one of my social media accounts!!


Tuesday, January 20, 2015

Taylor Ink Does Weddings!!

Hello all my fellow crafters! It has been so long. I apologize for my hiatus. 

Between work and the holidays, things were a tid bit crazy around here. However, I am back and committed to sharing my love of crafting and DIY with the masses. 

Today's post has everything to do with weddings. I am at that age when every one around me is getting engaged and married. One of those people in particular is my cousin Alyssa!! As she is more like a sister and  I am the maid of honor I aimed to make this experience as special as possible for her. 

Here are a couple of engagement projects I put together to celebrate the occasion. 

I created a flower bouquet out of paper for dress shopping and hopefully she can use it for the wedding rehearsal. Above all I wanted her to have a special keepsake.  


To create this beautiful bouquet I selected different types and sizes of flowers from the Cricut image library. Cutting was the easy part...
Assembling was the more difficult part but totally worth the final product. Thanks to my mom not only did it go quicker then I expected but I was nice to do a crafting project together. (I will do another blog post on how to assemble and tricks I picked up through trial and error)

Once all of the flowers have been assembled like this...
I added some embellishment

Using floral wire and floral tape I attached the flowers to their stems and started to form my bouquet.

After I finished my labor of love, it was time to put the engagement basket together! I bought a basket from Michael's that I got for a steal and created a really simple banner to adorn it. 

Some of the items in my basket included a monogrammed tea tumbler (I made by using the same monogramming technique I explain in my Vinyl Monogram and Bows post), a burlap and lace guest book by the fabulous David Tutera , personalized luggage tags from Shutterfly, an Alex and Ani bracelet with the path of life symbol in blue enamel (can you tell what the wedding colors are going to be),  and the paper flower bouquet. For a final touch I filled the tumbler with gummy ring pops as well as lined the bottom of the basket with the same yummy gummy candies :-)


And finally drum roll please.........The piece de resistance of my engagement bundle was the calendar inspired save the dates. 

On Pinterest I saw a lot of the same ideas used for save the dates. It wasn't until I was searching through the Cricut image library that I stumbled upon these awesome calendar cut outs. As I was looking through the different months a light bulb went off. Why couldn't these be turned into save the dates!?!? And that my friends is exactly what I did. I wanted to wait until she mailed them out before I shared in a blog post. Without further a do, here they are!

I added the love birds on a branch and updated the numbering that came with them. The calendars were originally for 2014. I also mixed it up by making some with  gold backing and some with champagne backing. Her colors as you have guessed by now are Navy Blue and champagne with some gold touches here and there.

It's honestly all about the details. I hand tied small twine bows and cut out little navy blue tags with the year on them. 


I am just so happy with how these turned out and I can't wait to share with you the wedding invites!!
 They are a secret for now but as soon as they are out the door I will be putting a post up. 


In the mean time look for a post on baseball themed wedding invitations coming soon!!

As always friends, Happy Crafting! ~ T

Taylor Ink does weddings! If you are looking for an invitation service look no further! I am available to do save the dates, wedding invitations, bridal invites, baby shower invites and much much more! You can contact me by email which can be found on my Contact Me page. 


Monday, October 20, 2014

Spooky Banner

I'm back! I have been traveling a lot for work the last couple weeks so it has been hard to get a project together to post. So here it is my latest project post. Hope you enjoy it as much as I enjoyed making it. May it inspire you to be festive with your Halloween decorating.

I love the look of fabric banners for decorating. I have seen so many cute ideas online and on Cricut.  Seeing as Halloween is weeks away I wanted to make a Halloween banner for myself. Of course I thought it looked so cute I knew I had to make one for my mom as well.

My final decision was to make a SPOOKY banner with lots of fabric, burlap and black satin ribbon.

Here is what you will need to make this super cute and rustic banner.

1. Cricut Explore (it isn't necessary you can trace the banner pieces out and cut by hand)
2. Cricut Design Space (again not necessary)
3. 1/2 yd of Halloween fabric 
4. 1/2 yd of a second Halloween fabric
5. Craft Interfacing 
6. Burlap Paper or Burlap Material
7. Iron/Ironing Board
8. Black Satin Ribbon
9. Black Cardstock
10. Hot Glue Gun
11. Green Burlap Ribbon
12. Needle & Thread

~ Step One ~

Cut out all of the pieces you will need to put the banner together. 

First we need to cut out of the fabric our banner pieces. I made my largest banner piece 7 x 12in and my smallest banner piece 6 x 11in You want the smallest one to show at least a half inch of the base piece on all sides. 


After the fabric is all cutout its time to iron on the Craft Interfacing. I bought Pellons Fusible Craft Interfacing by the yard at Joanne's. For more details on the materials I bought for this project check out my Craft Haul blog post.

I cut out squares of the interfacing and ironed it onto the back of my largest banner piece. There's no right way to do it. I probably could of taken a large section, fit as many pieces I could have onto the section to use as much of the interfacing as I could. 


After your done you will need to cut off the excess. 

Last item you will need to cut out is the burlap circles. I used burlap paper because it had a good stiffness to it for this project. I use my Cricut and cut out circles that were about the width of my largest banner piece.


I also cut out the letters using heavy black card stock in this fun Halloween font.

For a little extra color to my mainly black and orange banner I made some cute green burlap bows to add to the top of each banner.

(Comment below if you would like me to do a post on how to make ribbons! This really comes in handy with Christmas right around the corner)

Last step was putting it all together (don't do like I did the first time and attach it backwards...whoops!) I attached the satin ribbon to the back of the pendants under the burlap piece so that it remains securely fastened.

This is the finished product (thanks to  my mom's beautiful living room for being the perfect picture back drop)


I would love to hear from you! What sort of fall themed projects would you like to see on the blog? 

As always Happy Crafting and Happy Hauntings! ~ T

Thursday, October 2, 2014

Geometric Pumpkin Patch

It is officially fall so I can officially pull out the fall decorations (and Halloween decorations) without feeling like I am jumping the gun.


I love love love this time of year. The leaves changing colors, the smell of crisp fall air in the mornings and everything apple and pumpkin flavored. A little over a week ago  Alex and I took a ride to DeMeritt Hill Farm to do a little apple picking! A new favorite fall activity of mine. Check the blog this weekend for a bonus post on the trip to the orchard and an Apple Crisp Recipe you won't want to miss! 

Back to my obsession with everything Fall, I decided to create a fall tablescape for my kitchen table that can double for Halloween and basic fall decor. On Cricut Design Space I saw these adorable geometric pumpkins in a Make It Now project they were featuring.


The concoction I came up with was a geometric pumpkin pumpkin tablescape, made to look like a pumpkin patch.

Here is what you will need to make your geometric pumpkin patch:
1. Cricut Explore
2. Cricut Design Space Software
3. Orange Paper (I used varying colors and textures)
4. Green Paper (I used varying colors and textures)
5. Fall & Halloween Basics Paper Stack (used for accent pumpkin)
5. Stick or Twig
6. Tape Glider/Double Sided Tape
7.Hot Glue Gun
8. Green Easter Basket Grass (taken from my Easter decor)


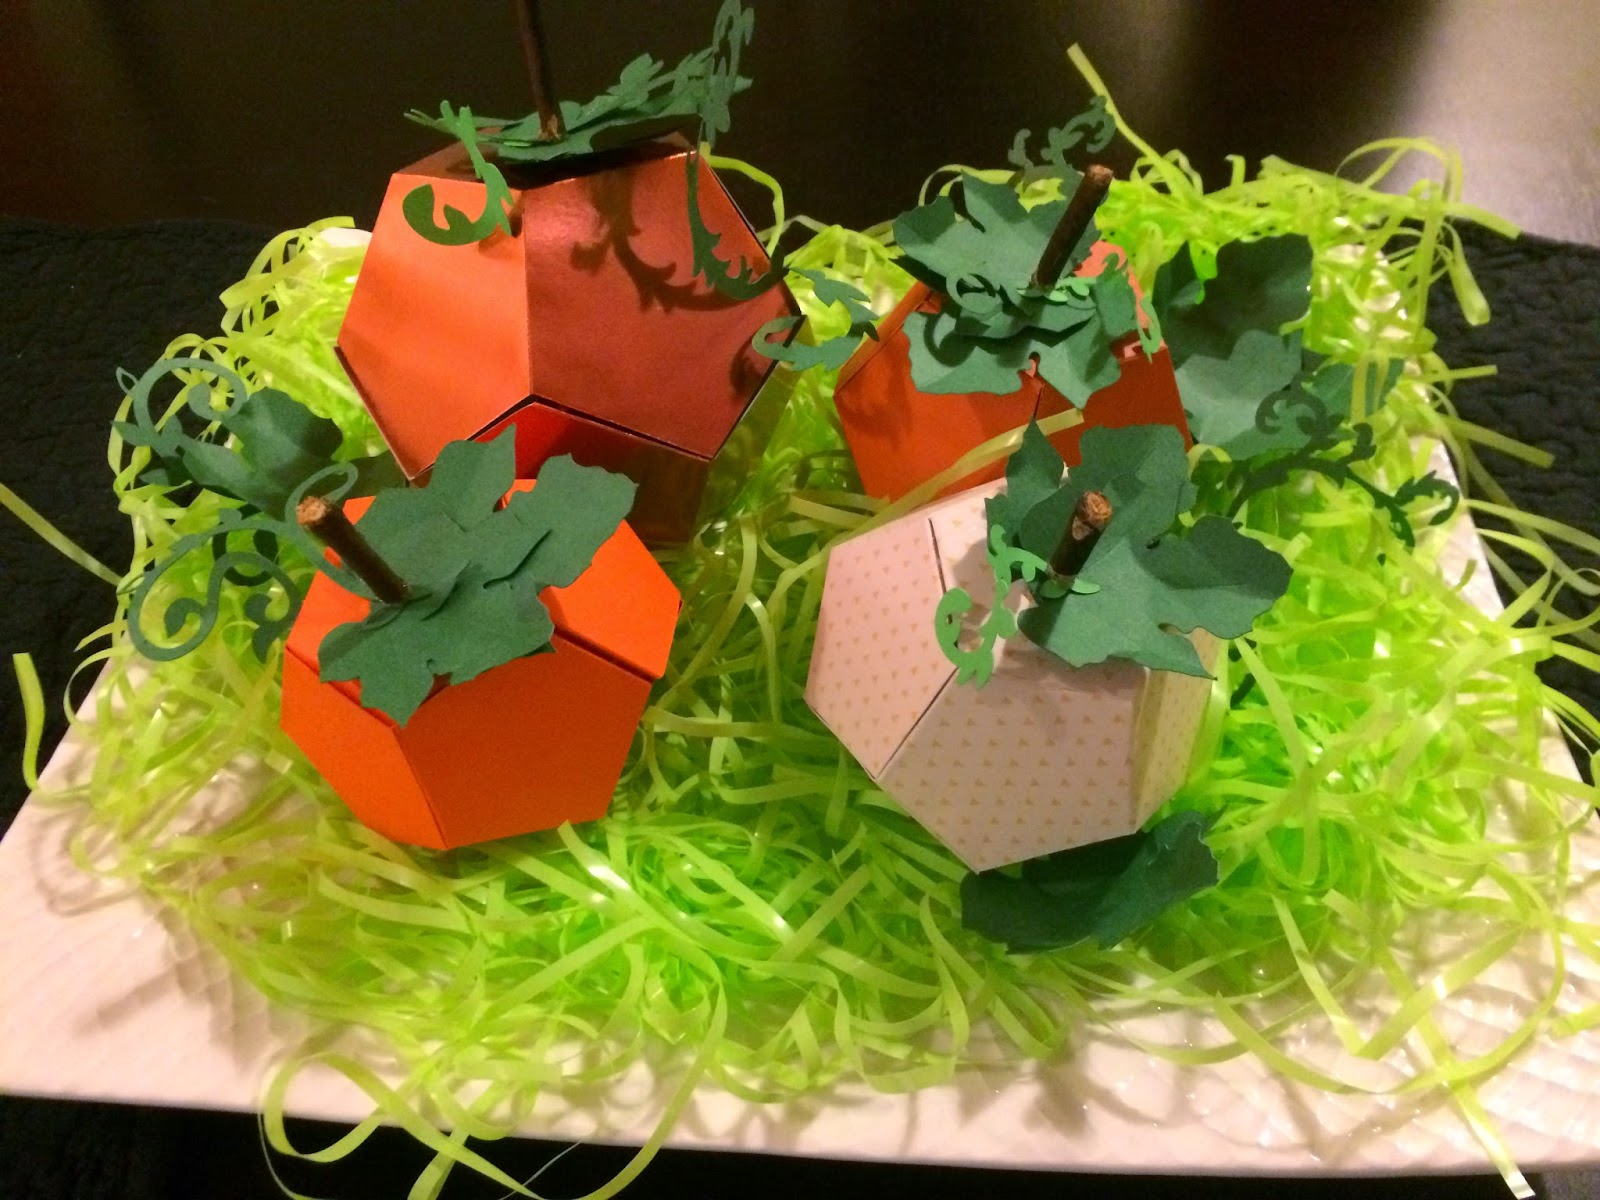
My first step was to make these awesome geometric pumpkins. I made a few different sizes, and they all are made with varying colors and textures of orange cardstock. In the Halloween Basic Stack I got from Joanne's it came with metallic finish orange paper that I thought would look so awesome as the largest pumpkin.


I cut out all the pumpkins and some leaves for embellishment. As I started to visualize what the pumpkins would look like I thought they would look cute with some vines. The vines I cut out in different colors and styles to mix it up. Online they used floral wire which was a cute option as well, I went with something a bit different to change it up.


My second Step was to put them all together! This was the fun part.Once the pumpkins were assembled I played around with the placement of the leaves and vines. After I had the placement down I put a little bit of hot glue on the backs of my leaves and attached them. Doing the same for the vines.


Last but not least we need a stem! I found a small branch outside my apartment building just laying on the side walk. Perfect width for a small paper pumpkin. I cut off pieces with the scissors and hot glued them to the tops of each of my pumpkins for the stem (saw this idea on Cricut, super cute!)


Now it's time to put it all together!! I cut out some extra vines to stick in the grass here and there between the pumpkins. It doesn't have to look perfect, the beauty is in the imperfections. 

and here is the fnal product...


I am so happy it's fall, and you bet there will be more fall posts on the blog all season long!

What kind of fall themed DIY decor are you looking forward to trying out? Is there some other theme you would do for a fall tablescape?

I'd love to hear from you!

Happy Crafting ~ T


Monday, September 22, 2014

Craft Store Haul: Paper, Pens and Fabric Oh My!

So I went a little crazy these last two weeks....


I got my Cricut Explore about 2 weeks ago and there are so many projects I wanted to get started on and accessories that I wanted to get a hold of that I visited Joann Fabrics twice in one week as well as frequented the Cricut website (to take advantage of their accessory sale).

Let's begin reviewing the purchases I made this week! (All totally necessary :-))


My first stop was Amazon

They had some pretty awesome deals on some of the Cricut accessories I was itching to get my hands on. I am an Amazon Prime member so I received free two day shipping!


(Ordered the deep cut blade and housing after the fact, it's on its way!)

My second stop was Cricut
(Sometimes I get on their website and can't help myself)

Cricut is having a sale this week offering 35% off supplies and 50% off clearance items along with free shipping on orders over $35 dollars if you use the code FREESHIP35 ( I took full advantage). I have been pining over the new pen sets Cricut has released in recent weeks so as soon as I saw they were on sale I grabbed them up.


German Carbide Premium Blade

Bonus Purchase! I got the September mystery box which contained...


12 x 24 Standard Grip Cutting Mat
Southwest Cardstock
Antiquity Cardstock
Tablescapes Fall and Winter Cartridge
Autumn Celebrations

I'm so glad I got the mystery box it was really worth it!

My third and final stop was to Joann Fabric and Craft Store.

If you know me you know I love, love, loooooove Joann's.
Lucky for me they were having their coupon commotion last week. The coupon commotion is over now but Joann's always has coupons online, or you can sign up to receive them in the mail. For a little extra treat text the word COUPON to 56266 to get a 20% off your entire purchase.  I always take advantage of their coupons because usually you can get some pretty fantastic deals (I've linked to the coupons above).

My first trip to Joann's was to look for fancy cardstock to do mock ups of wedding invites for my cousin (blog post to come, Taylor Ink does weddings!). Joann had their single sheets of cardstock 5 for $1, you can't beat that!


Foundations Finish in Oceanic, Cardstock
Gemstone Finish in Pearl, Cardstock
Gemstone Finish in Opal, Cardstock
String of Pearls Glitter Cardstock
Random small sheets of Cardstock
Adhesive Foam Dots
Decorative Twine
Gold Organza

(I got 5 sheets of each color listed plus a few sheets of the smaller sized paper. Can you believe I got all the stuff above for $9!? Believe it)

My second trip was to get supplies for future blog posts and to stock up on basic colored cardstock so whenever I get inspired the supplies I need are right there at my finger tips.


1 yd of Halloween Polka Dot Fabric
1 yd of Halloween Striped Fabric
3 yds of craft bonding
Black Satin Ribbon
4 Sheets of Textured Felt
4 Skeins of  Red Heart Aran Fleck Yarn
9mm [US13] Circular Knitting Needles
Ring Stitch Markers
Detachable Stitch Markers
Stitch Holder
6x6 Burlap Paper Stack
12 x 12 Fall & Halloween Combo Cardstock
8 1/2 x 11 Fall and Halloween Basics Stack
8 1/2 x 11 World Tour Cardstock Stack
Distress Ink Pads in Vintage Photo & Tea Dye

I have tried to link all of the supplies I have bought up above for you to check out.

And make sure you keep an eye out for some of these items being used in future blog posts....(hint, hint)

I want to hear from all of you!

What kinds of projects can you dream up using any of the supplies listed? I'd love to hear your ideas, and maybe try one out myself and feature it on the blog!

As always, Happy Crafting!! ~ T

Tuesday, September 16, 2014

Tying the Knot

On September 15th I had the pleasure of being in one of my very dear friend's wedding, Danielle Mesich, or should I say Boisvert! Since she is the one who got me into paper crafting it is only fair I give her a shout out and share with you how I made her custom wedding card and coordinating bow/wrapping for her gift.

Danielle's theme was nautical, the wedding was at DiMillo's Restaurant in Portland which is a floating restaurant in the port. The invites included anchors and light houses, seashells adorned the tables as well as chocolate lobster favors. With that I thought it was only fitting that the wedding card I created for Danielle followed that theme as well. 

If you want to create a similar card here is what you will need. ( I used the Cricut Explore for my project but if you want to use any nautical themed paper punches for embellishing your card you can do so as well)
1. Ribbon (I chose a burlap green ribbon and a blue grosgrain ribbon)
2. Green and Navy Cardstock
3. Gold gilded cardstock with Anchors (or any patterned paper you like)
4. Corrugated paper
5. Adhesive
6. Cricut Explore
7. Envelope Punch Board (I linked to it on Joann's website, I love my envelop punch board)


Here's a close up of the paper I used (I swapped the orange out for the green after I took this picture)


~ Step One ~


There are three shape cutouts that we need to make, the card, a large oval, and a slightly smaller over (the smaller oval is where I made my tying the knot cut and rope cut)

Using Cricut Design Space I chose the card format I wanted to use ( I chose the card layout from the Sweet Treats image set). Using the rulers on the top and left hand side of the screen I measured out how big I wanted my card to be. for this card I chose kind of an odd measurement, 5 1/2 in  x  9in.


The image I chose had the main part of the card but also an insert for writing a greeting on. Because I wanted to do a layering affect on the inside the insert that came with the original card image I just duplicated and made slightly smaller than the original.

For the main piece of the card I chose the gold gilded paper and for the two rectangles on the inside I chose green for the large one and navy for the smaller one.

On the navy blue portion of the card I added some text which I used my Cricut silver metallic pen to to have the machine write out for me (my handwriting is terrible when under pressure, same goes for my  spelling :-) )

~ Step 2 ~


Next step is to cut out our ovals for the from of the card along with choosing what the front should say. I found this really great rope writing and rope heart image online I wanted to use. Following the steps from my last blog post on how to upload your own images and cut them, do the same with the image you choose to use for the front of the card. You can also use images you might already own or are subscribed to, the world is your oyster, 


Cute right!

For the large oval I chose the corrugated paper and for the smaller oval I chose a chevron cardstock. 

~ Step 3 ~


Now it is time to put it all together! 

I started with the inside of the card using my Scotch Advanced Tape Glider placed adhesive to the back of each of the rectangles, lined them up and attached them one by one to the card.

For an added touch to the front of the card I added some ribbon to the first Oval so that the colors would peak through the cutouts of my small oval. Again using my tape glider I secured the ovals and ribbon to the front of my card.

And here is the finished product!


I wasn't completely happy with it so I added the cutout piece from the heart and did a shadow effect (Cricut's cuts are so precise!)


~ Step 4 ~

Envelope and Gift Wrap.

I chose the same green cardstock I used on the inside of my card for the envelope. Following the easy instructions on my envelope punch board it was simple to make!

For Danielle's wedding present I got her a personalized Christmas ornament made by a really cool artist I found at the Yarmouth Clam Festival this year. They are called Chart Metalworks, out of Portland, ME. It's a husband and wife team that create handcrafted custom map and nautical chart jewelry. For Danielle's I chose the coordinates where DiMillo's is for the map that appears on one side of the ornament. 

This is how it turned out...


I linked to their website above if you would like to check out some more of their pieces. You won't be disappointed!


The last item of business I needed to take care of was tying it all together. Using my Cricut Explore again I chose a bow cut out that turns into a 3D bow. How cool is that!! I chose a bow from the Something to Celebrate image set.


I kind of just eyeballed the size I would need to make it. I didn't want it too big so that it completely took over the box.

Here is how it turned out....
I chose a neutral chevron cardstock for the bow.

To wrap it all together I took some of the leftover navy blue ribbon I used on the card tied the box and the card together like a present, and stuck the paper bow to the top of the box with some adhesive. I left tails with the navy blue ribbon for that little extra something. 

The finished product turned out beautiful I couldn't be more pleased.


I would love to hear your ideas on what you would do for a nautical themed wedding card. 


Happy Crafting!! ~ T