

It is officially fall so I can officially pull out the fall decorations (and Halloween decorations) without feeling like I am jumping the gun.

I love love love this time of year. The leaves changing colors, the smell of crisp fall air in the mornings and everything apple and pumpkin flavored. A little over a week ago Alex and I took a ride to DeMeritt Hill Farm to do a little apple picking! A new favorite fall activity of mine. Check the blog this weekend for a bonus post on the trip to the orchard and an Apple Crisp Recipe you won't want to miss!
Back to my obsession with everything Fall, I decided to create a fall tablescape for my kitchen table that can double for Halloween and basic fall decor. On Cricut Design Space I saw these adorable geometric pumpkins in a Make It Now project they were featuring.

The concoction I came up with was a geometric pumpkin pumpkin tablescape, made to look like a pumpkin patch.
Here is what you will need to make your geometric pumpkin patch:
1. Cricut Explore
2. Cricut Design Space Software
3. Orange Paper (I used varying colors and textures)
4. Green Paper (I used varying colors and textures)
5. Fall & Halloween Basics Paper Stack (used for accent pumpkin)
5. Stick or Twig
6. Tape Glider/Double Sided Tape
7.Hot Glue Gun
8. Green Easter Basket Grass (taken from my Easter decor)


8. Green Easter Basket Grass (taken from my Easter decor)
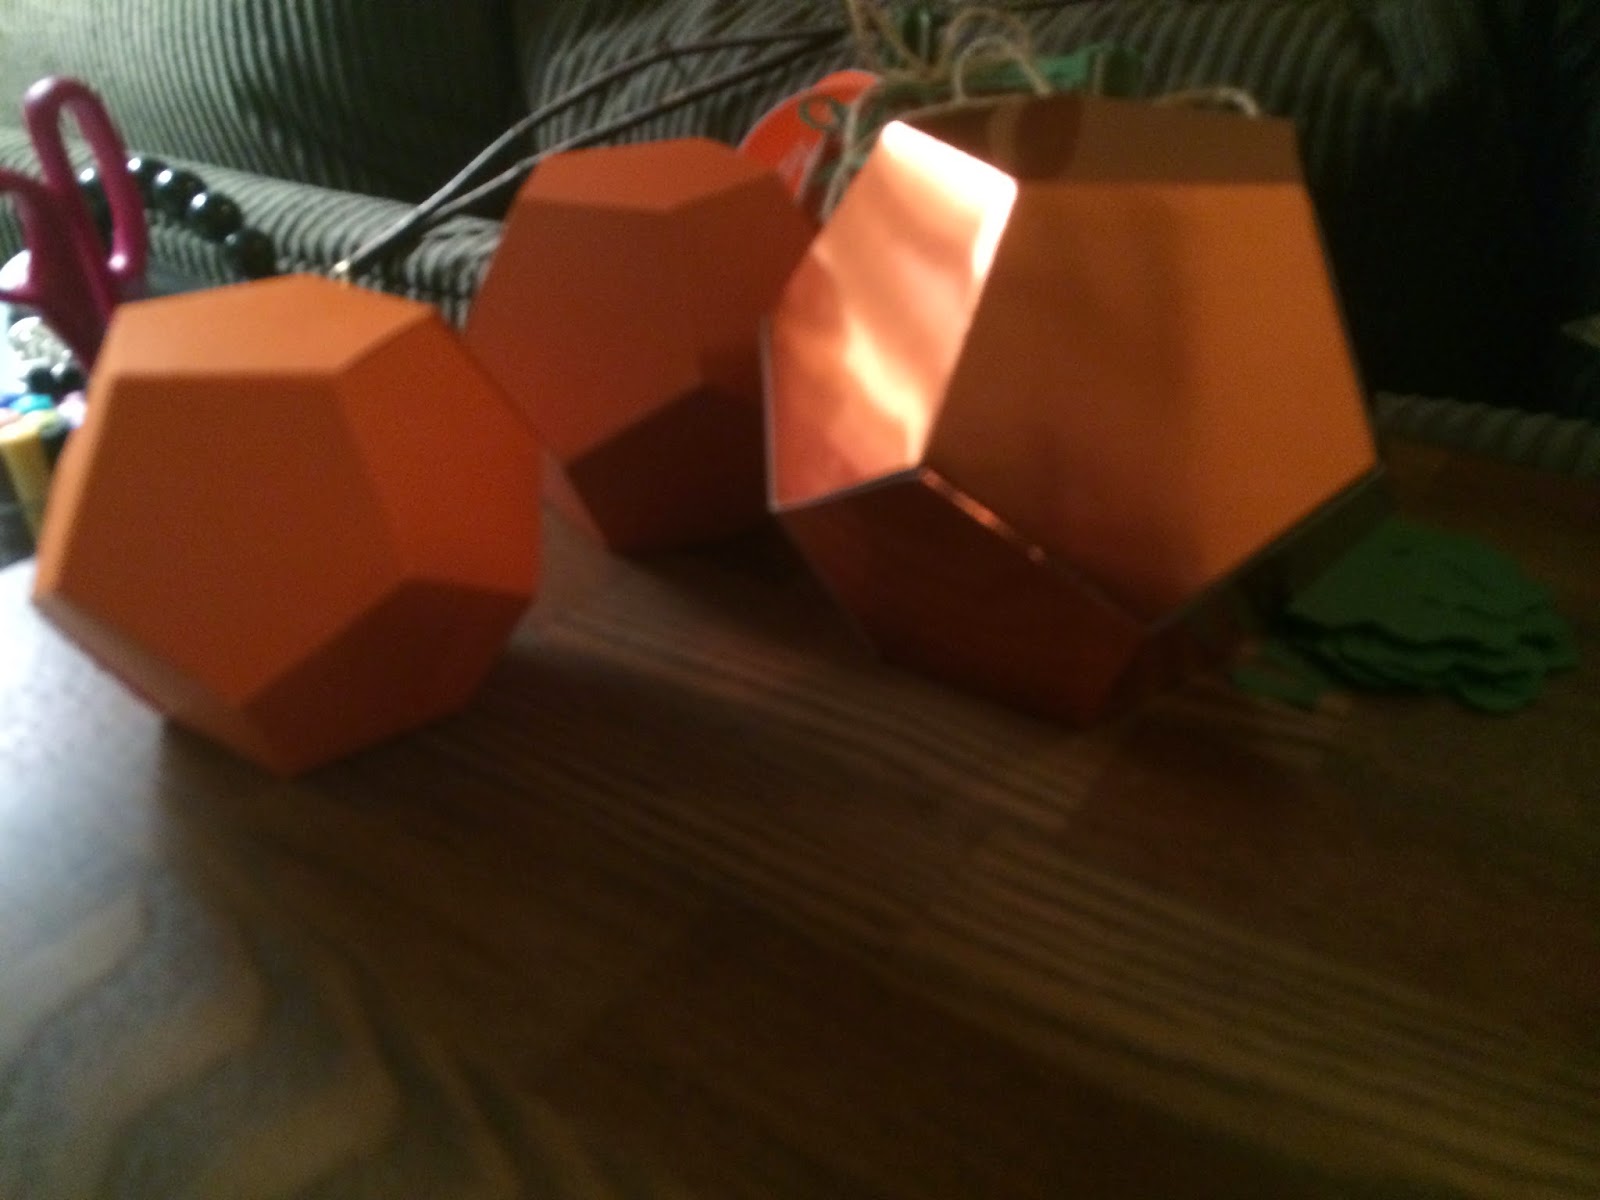
My first step was to make these awesome geometric pumpkins. I made a few different sizes, and they all are made with varying colors and textures of orange cardstock. In the Halloween Basic Stack I got from Joanne's it came with metallic finish orange paper that I thought would look so awesome as the largest pumpkin.
I cut out all the pumpkins and some leaves for embellishment. As I started to visualize what the pumpkins would look like I thought they would look cute with some vines. The vines I cut out in different colors and styles to mix it up. Online they used floral wire which was a cute option as well, I went with something a bit different to change it up.
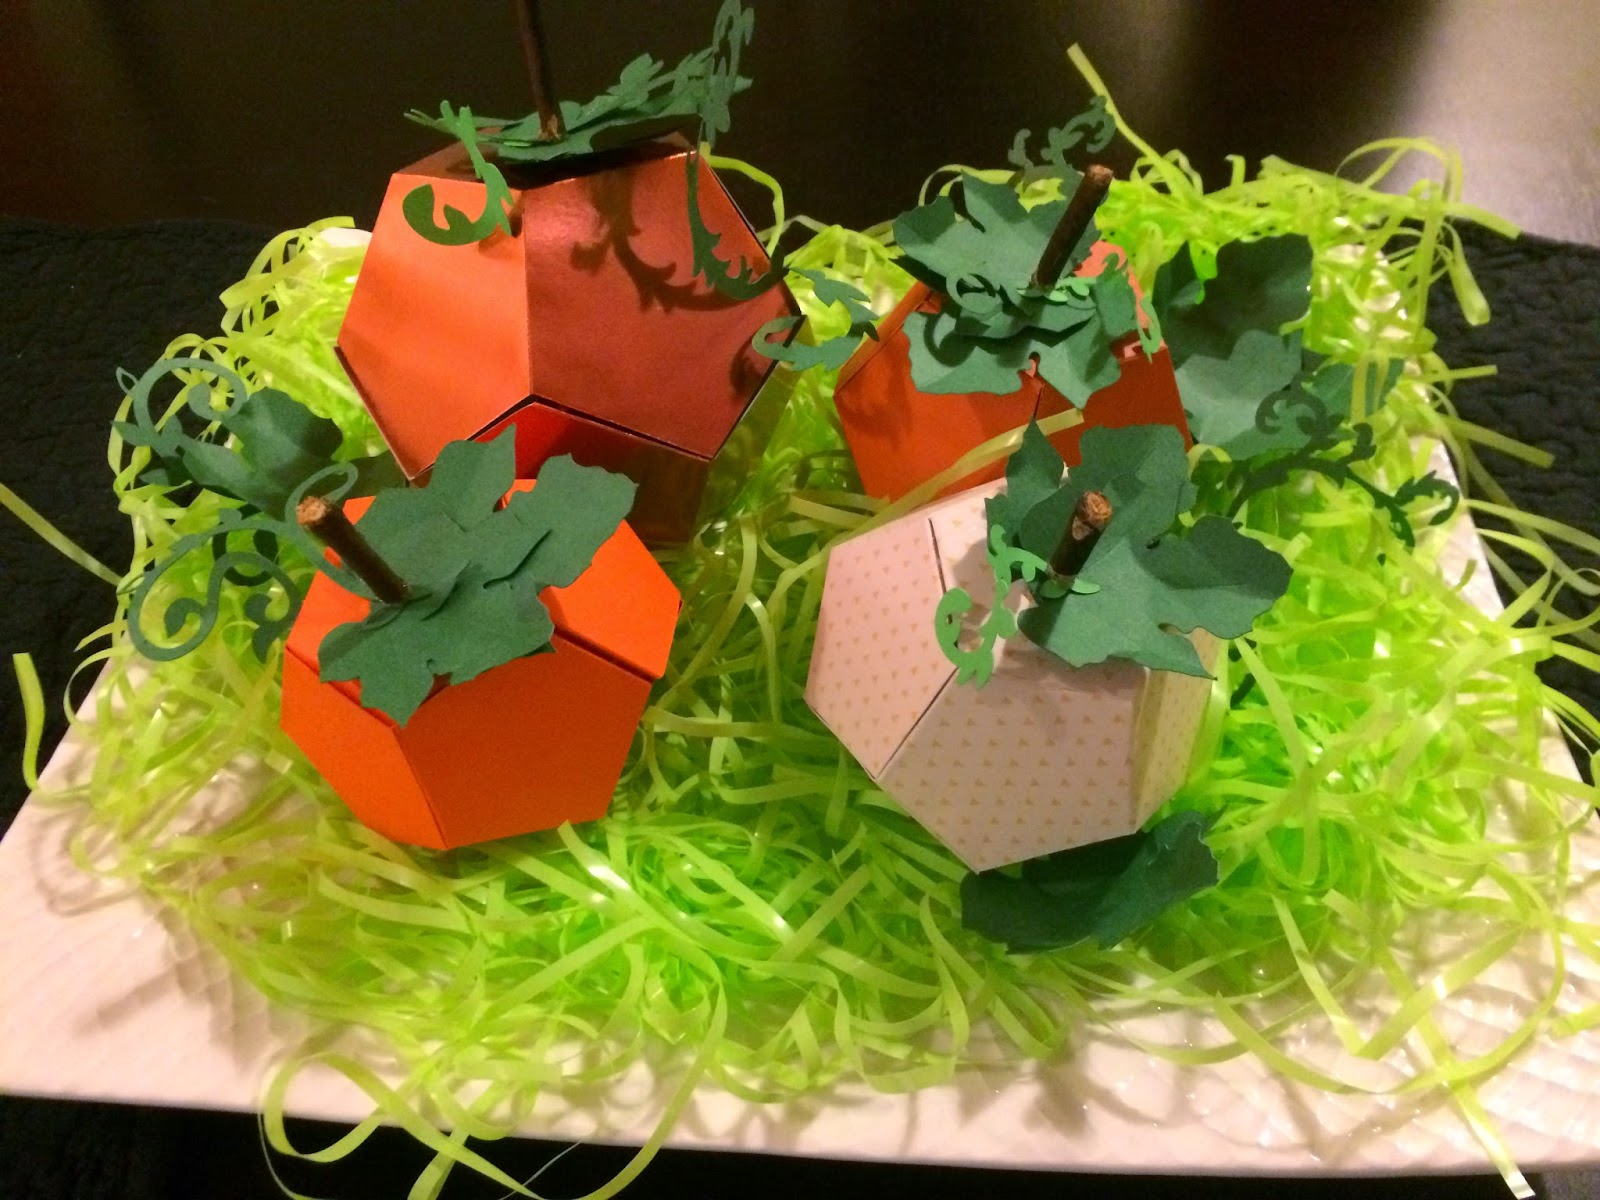
My second Step was to put them all together! This was the fun part.Once the pumpkins were assembled I played around with the placement of the leaves and vines. After I had the placement down I put a little bit of hot glue on the backs of my leaves and attached them. Doing the same for the vines.
Last but not least we need a stem! I found a small branch outside my apartment building just laying on the side walk. Perfect width for a small paper pumpkin. I cut off pieces with the scissors and hot glued them to the tops of each of my pumpkins for the stem (saw this idea on Cricut, super cute!)
Now it's time to put it all together!! I cut out some extra vines to stick in the grass here and there between the pumpkins. It doesn't have to look perfect, the beauty is in the imperfections.
and here is the fnal product...
I am so happy it's fall, and you bet there will be more fall posts on the blog all season long!
What kind of fall themed DIY decor are you looking forward to trying out? Is there some other theme you would do for a fall tablescape?
I'd love to hear from you!
Happy Crafting ~ T
No comments:
Post a Comment