

I cannot say it enough, I AM SO EXCITED TO FINALLY HAVE MY CRICUT EXPLORE!! Did I tell you I am excited? :-)
Cricut really does a great job with it's packaging and little goodies it gives you to begin using it right away.

I purchased a bundle directly from Cricut that included not just the machine but also 3 of the basic Mats and the tools set. The Cricut Explore (no matter if you buy just the machine or a bundle) also comes with a metallic pen, one 12" x 12" standard grip cutting mat, black and jade cardstock, silver vinyl, white iron-on, and two Duck Tape sheets. That is quite a bit of materials to try out your new machine!


For my first Explore project I thought why not personalize my machine!!! While browsing the Cricut Design Space projects gallery and Pinterest, my love of all things preppy steered me towards monograms and bows (which is probably why I love Kate Spade so much, bows, bows and more bows).
Here is what you will need to get started...
1. Laptop (to create your own monogram)
2. Cricut Explore
3. Vinyl in any color (I'm using the vinyl that came with my machine)
4. Clear contact paper (or vinyl transfer paper)
~ Step One ~
First we need to create a monogram to use. It's super easy to do using Microsoft Word. I found this easy to follow blog post by In My Own Style (you can also find this link on my Pinterest) with step by step instructions on how to create and edit your own monogram. Your finished product should look something similar to this...

(How cool is this!! I'm going to be a monogramming fool!)
~ Step Two ~
Next we need to get our monogram into Cricut Design Space. Here's the part where I will insert a little blurb about how awesome the Design Space software is and how you can upload your own images to use on projects. Make sure you take a screen shot of your monogram, open it in paint, crop and clean it up a bit, then save as a .jpg. On the Design Space main screen select Upload Image from the menu on the left hand side of the window.

We are going to do a Basic Upload. From here you can browse the images on your computer.

Once you have selected your match your upload image. Choose whether it is a Simple Image, Moderately Complex Image or a Complex Image. For the monogram I chose simple. The program will then ask you to clean up the image by making the areas that you don't want in the cut path checkered.

~ Step Three ~
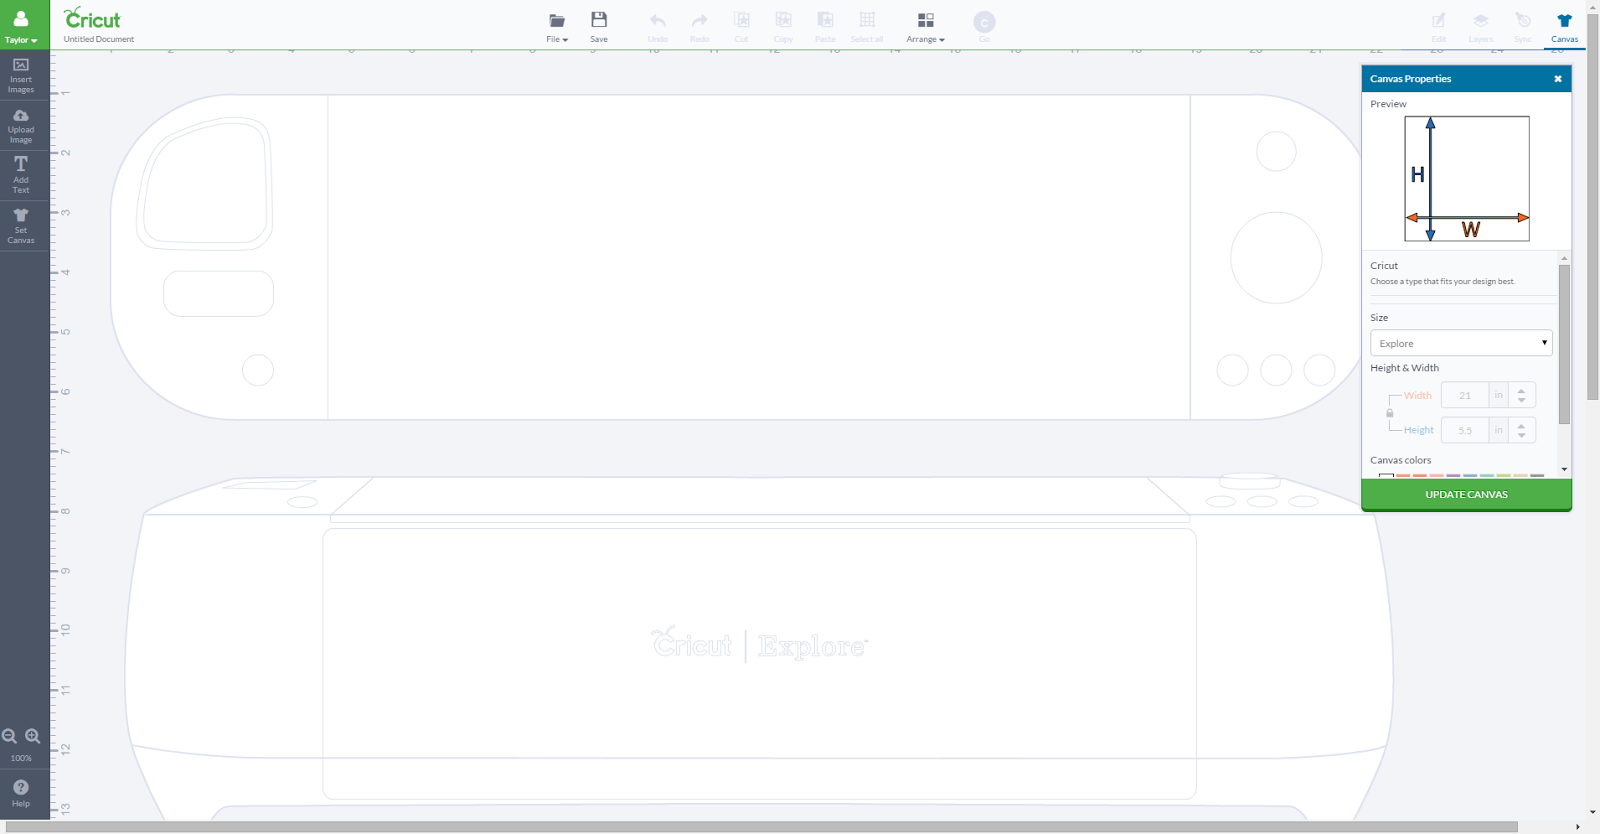
After you have cleaned your image up it's time to re-size the design to fit your canvas. Design Space has this wonderful canvas feature where you can choose a variety of canvases you can work with, t-shirts, aprons, pillows.


When you choose a canvas it shows up as a shadow on the design window that is true to size, it makes it easy for you to visualize how big or small you want to make your image. Lucky for us their is a Cricut Explore Canvas! Made my life so much easier instead of trying to guess how big I needed to make my monogram.
I sized my monogram so that I left a little bit of room at the bottom to add my bow. For the bow I just searched the image library and selected this cute polka dot one. I sized and arranged the bow along with my monogram to get preview of what it would look like on the Cricut.

~ Step Four ~
Now it's time to cut! Since I decided to cut both images out on the same colored vinyl I only needed one mat (standard grip). Select the Go button to start the process.

It will give you a preview of how many mats you will need and how the images will cut out on the mat. By selecting next it will take you to the prompt screen where your first step will be to load your mat into the cricket. Next make sure your dial is set to vinyl. Lastly, press go on the machine and watch the magic happen!
~ Step Five ~
(Last Step You're Almost There!)
Once the machine is done cutting unload the mat, I had some excess vinyl that I didn't want to waste so I cut off the parts that I could use for other projects and in the scrap drawer they went. Next start removing the excess vinyl from around your cut, making sure the cut stays stuck to the backing. Once that is completed take your contact paper, cut a piece to the size of your monogram and bow. Stick it on top of your cuts making sure rub on top a bit so that when you lift the contact paper up the image comes with it.
Center your monogram on the Cricut, gently rub the top with your scrapper tool, and slowly lift up the contact paper. Do the same for the bow....and you're done!!


Now you have a fancy personalized Cricut Explore!
That's it! It's super simple and easy to monogram just about anything, the possibilities are endless. Monogrammed tumblers, notebooks, planners, tech cases, laptops and the list goes on. I hope you enjoyed this post. I know I enjoyed making it!
Are there any other types of fonts you would rather use for a monogram? What would you monogram?
Happy Monogramming!! ~ T
No comments:
Post a Comment